
Self-evolving Context Database for AI Agents. Unify Agent Memory, Knowledge RAG and Skills.
Python agent-contextagent-memoryagent-pluginsagentic-ragcontext-databasedsh-pluginknowledge-basememorymemory-managementself-evolvingvector-database
Step 1: Configure MCP
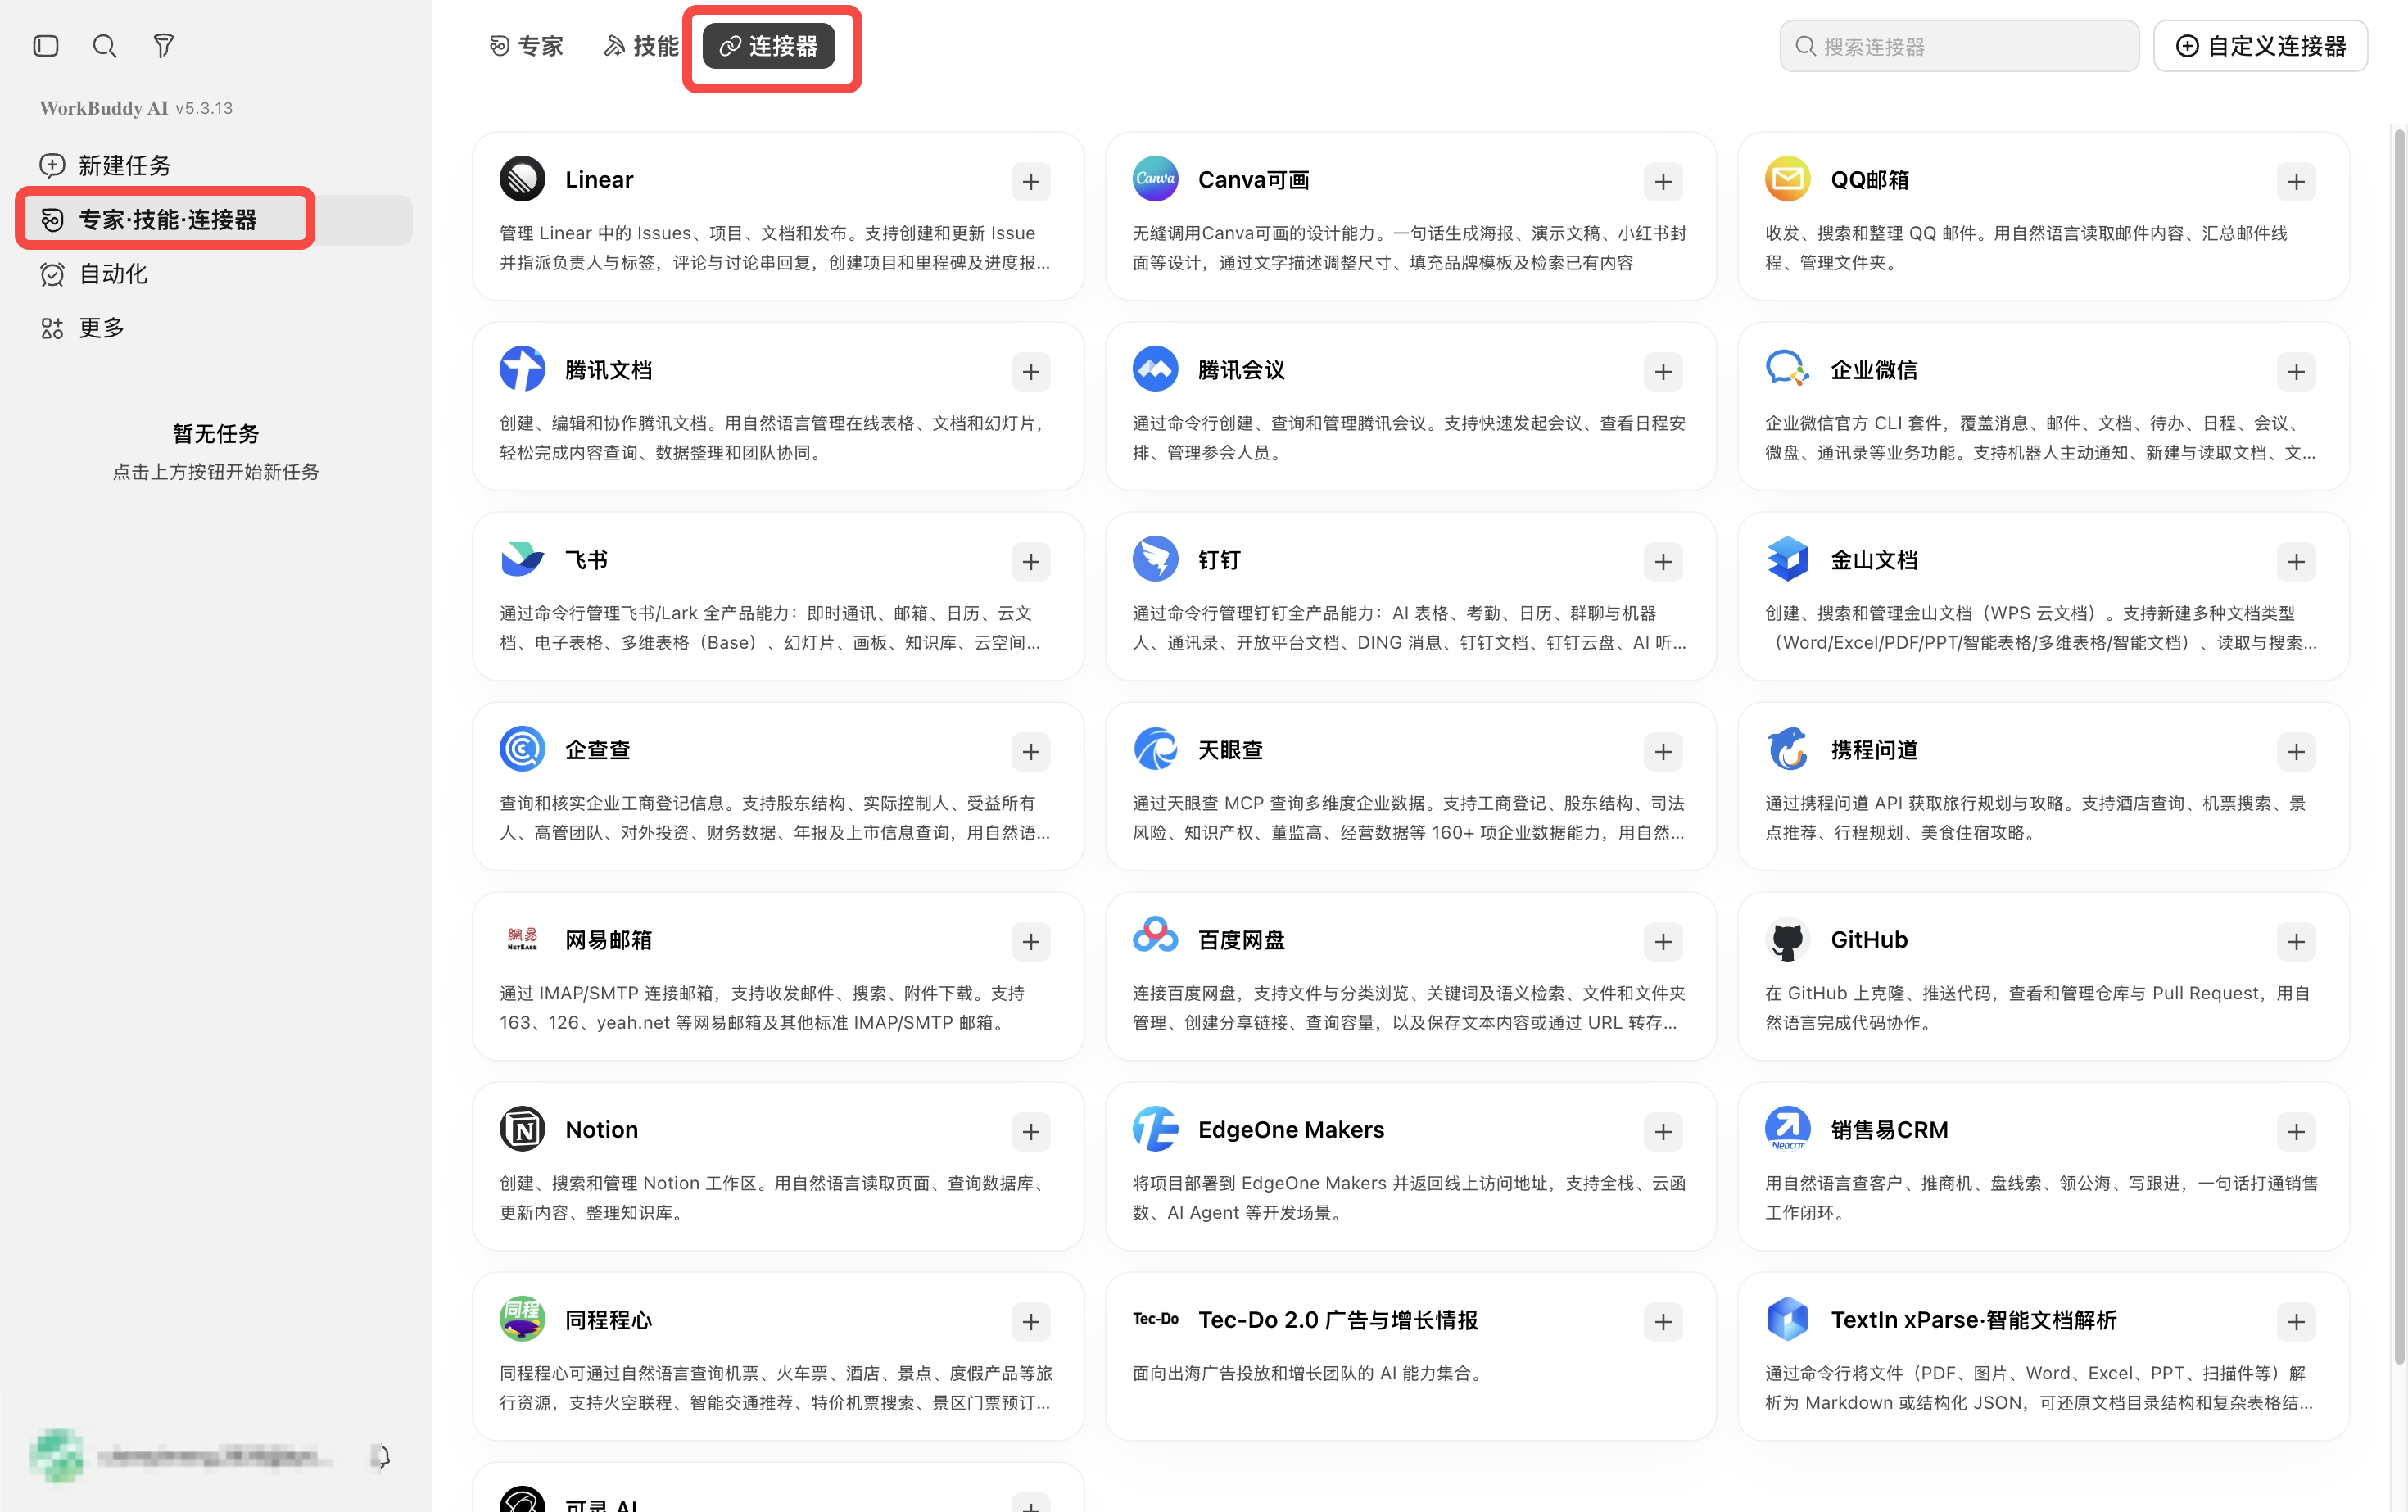
Open WorkBuddy, select Experts · Skills · Connectors in the sidebar, and open the Connectors tab.
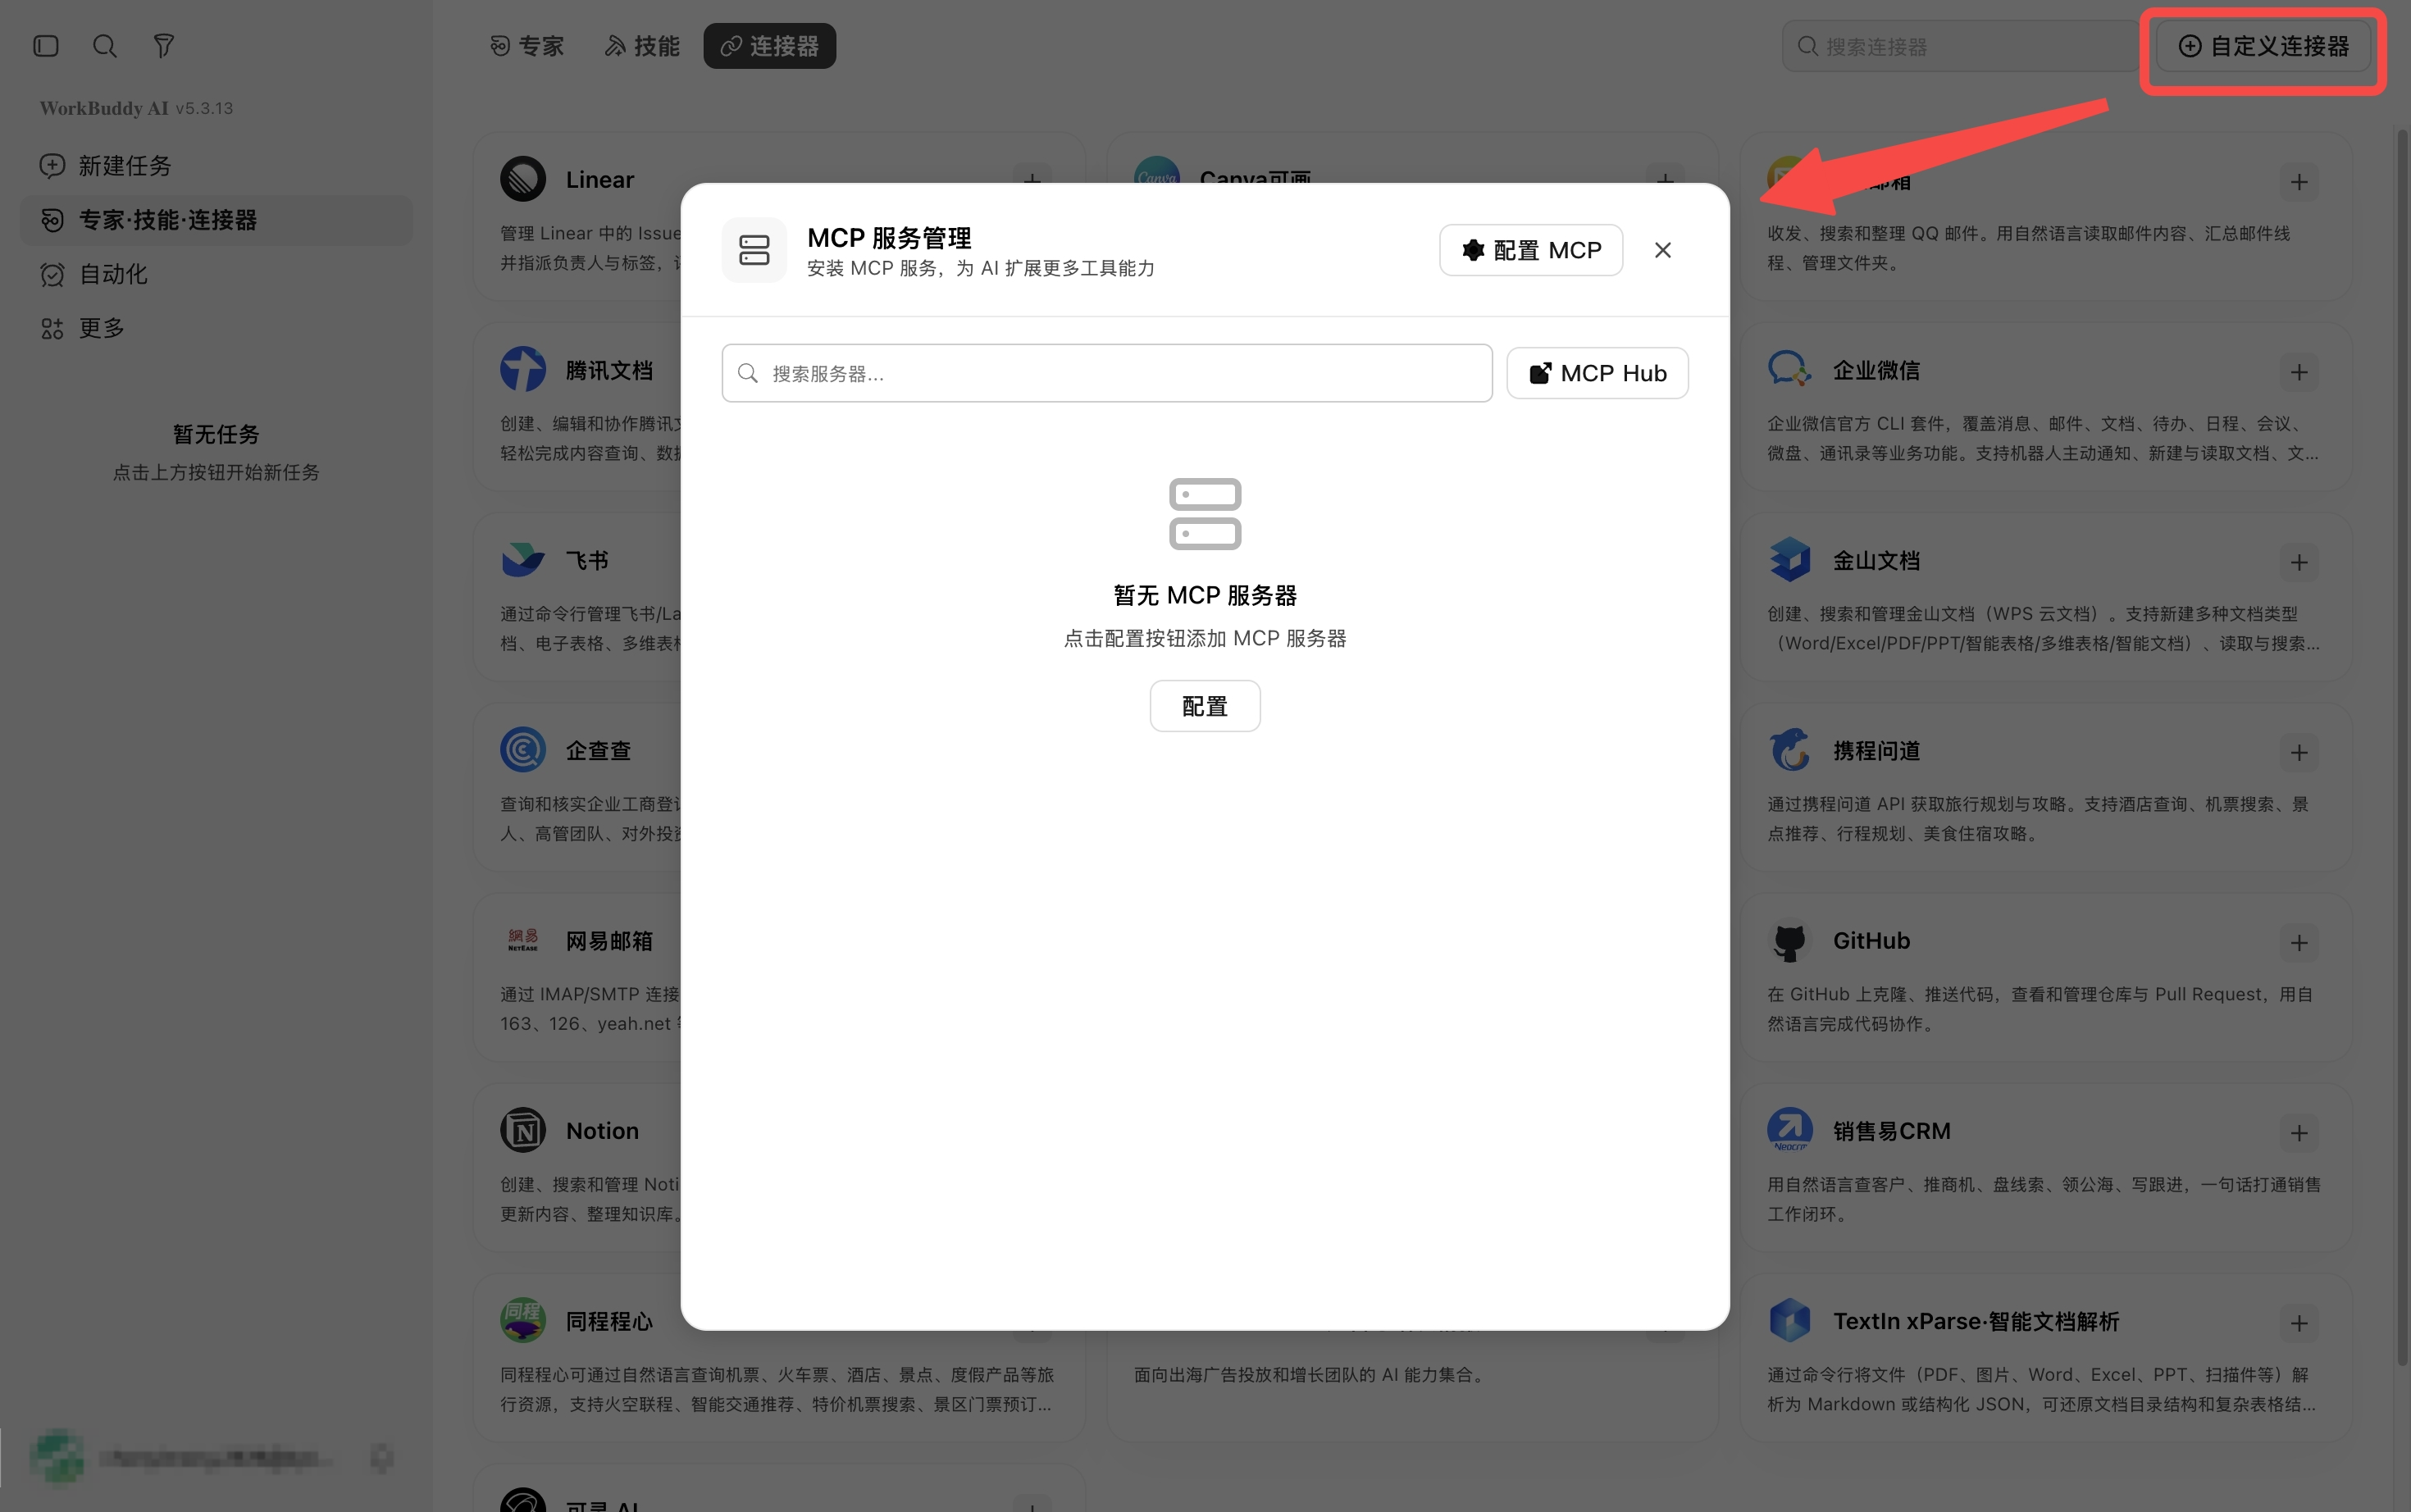
Select Custom Connector in the upper-right corner to open MCP service management.
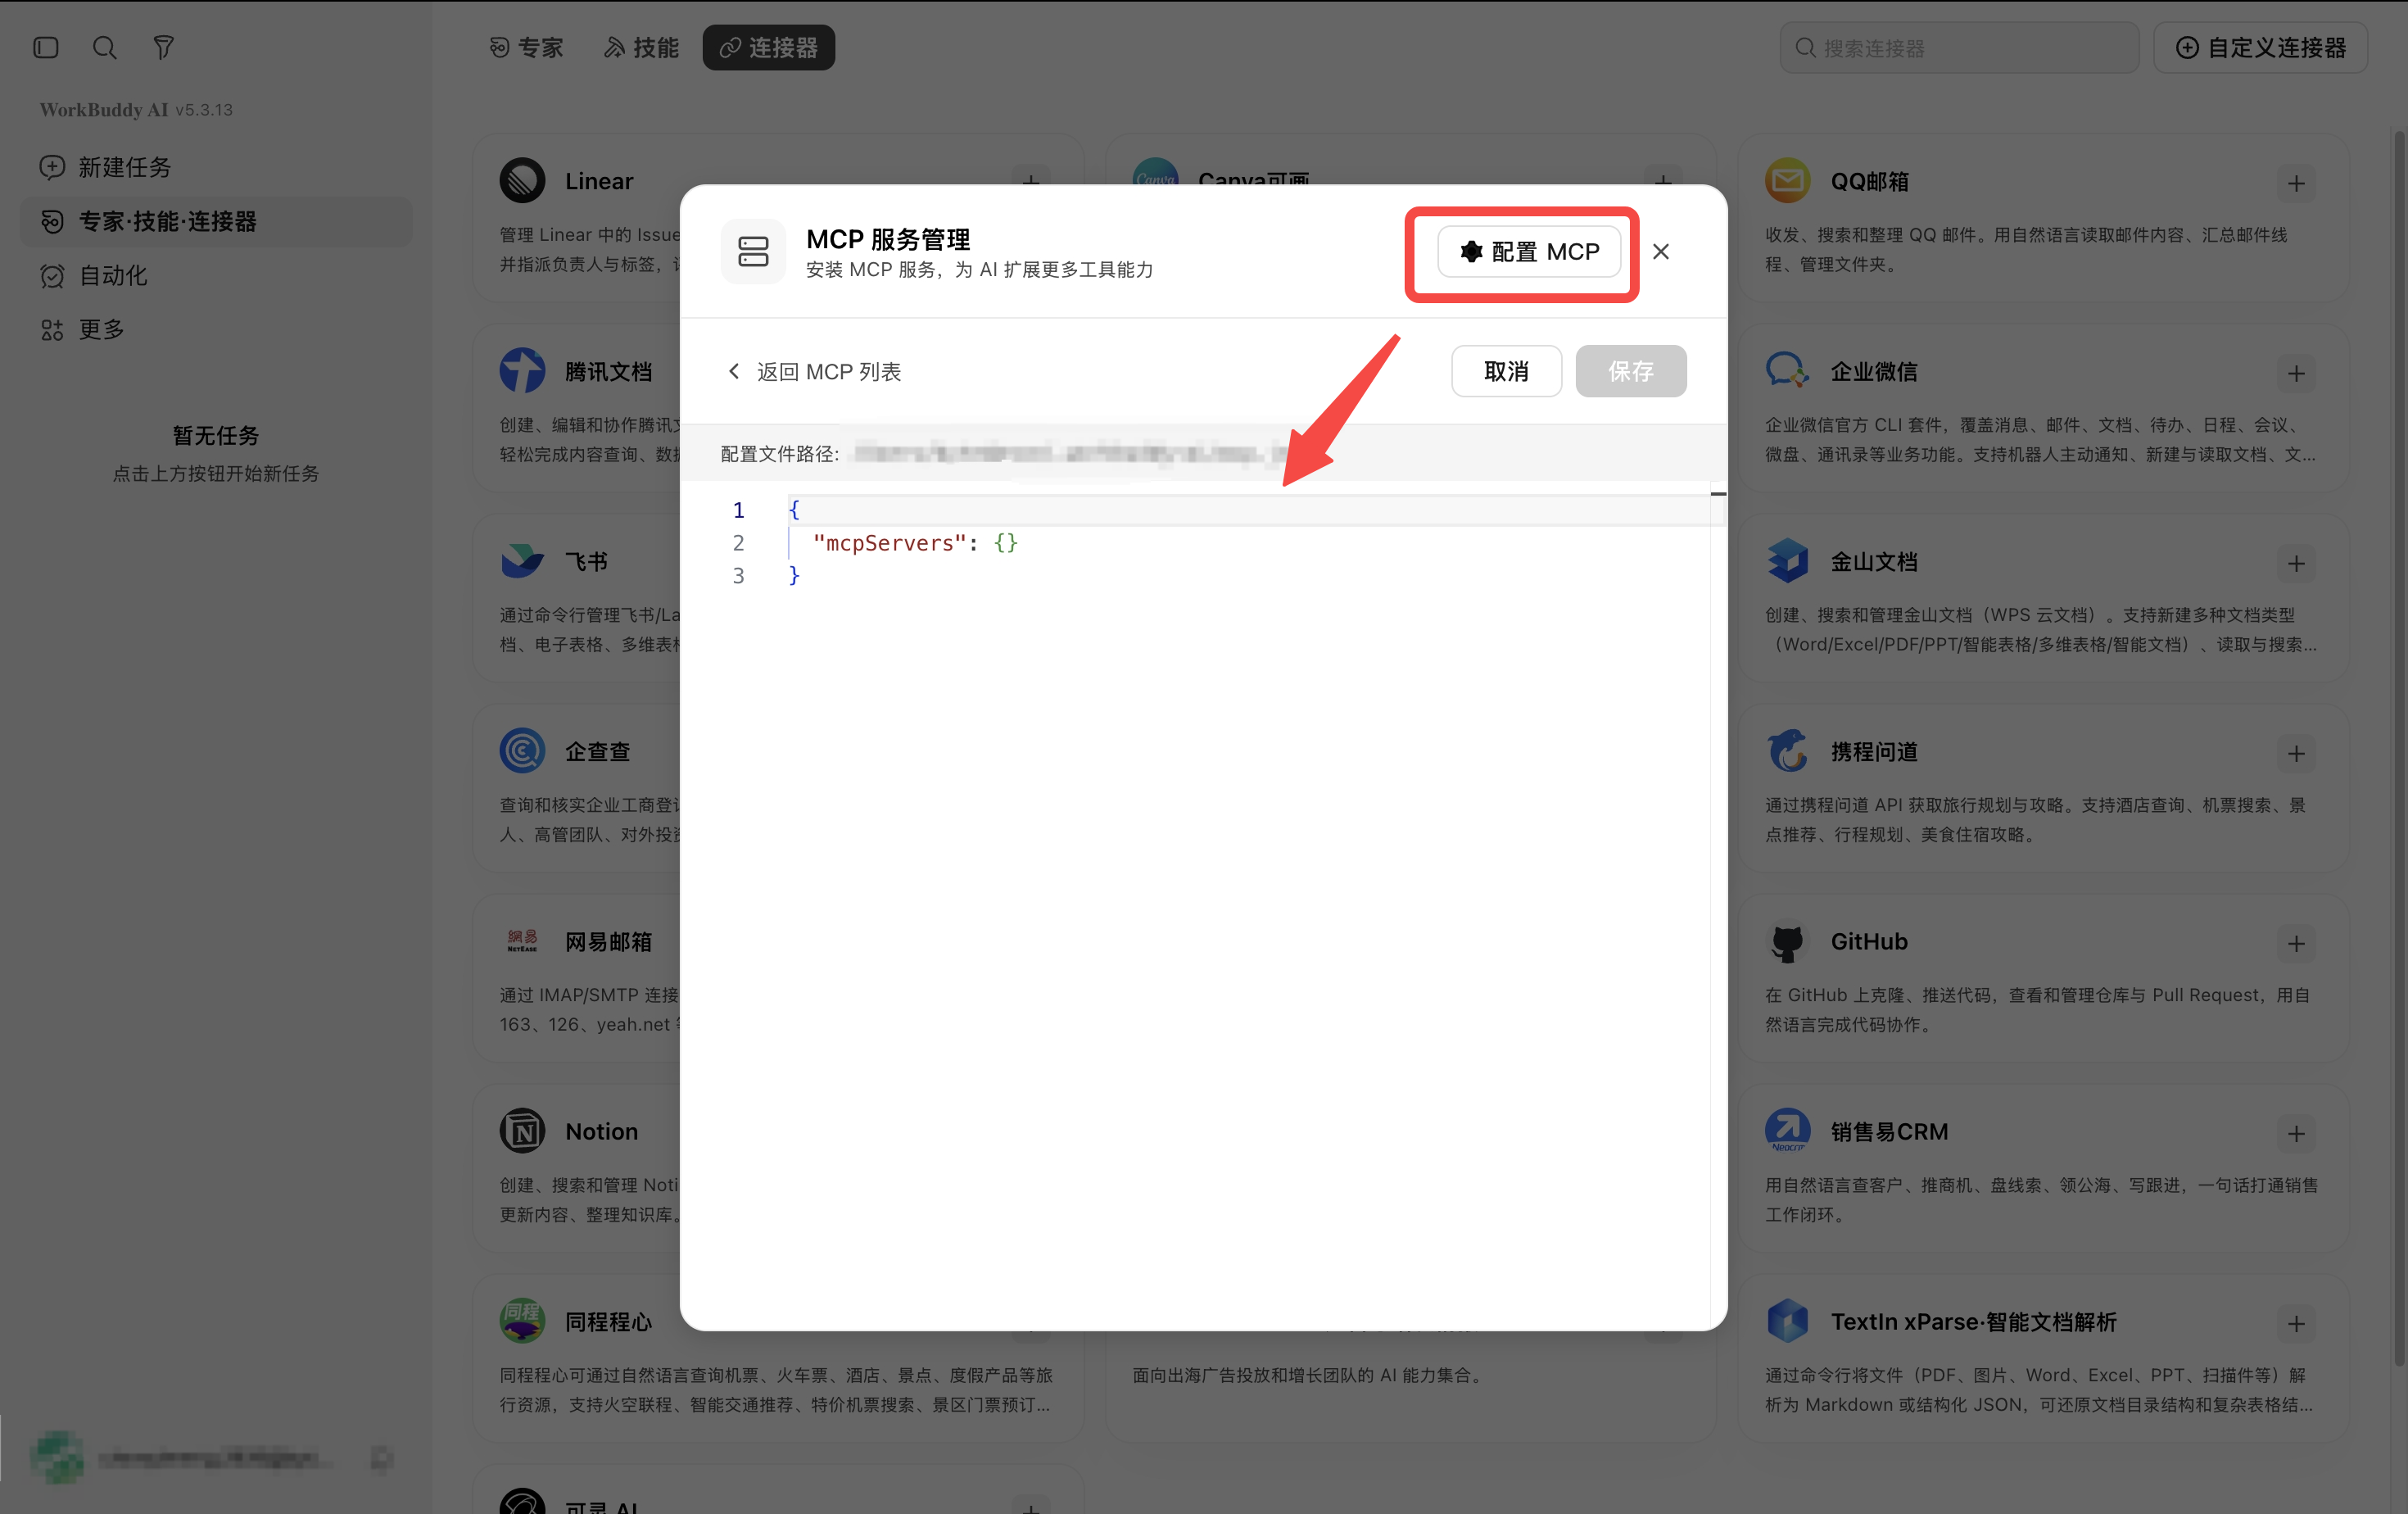
Select Configure MCP to open the MCP configuration editor.
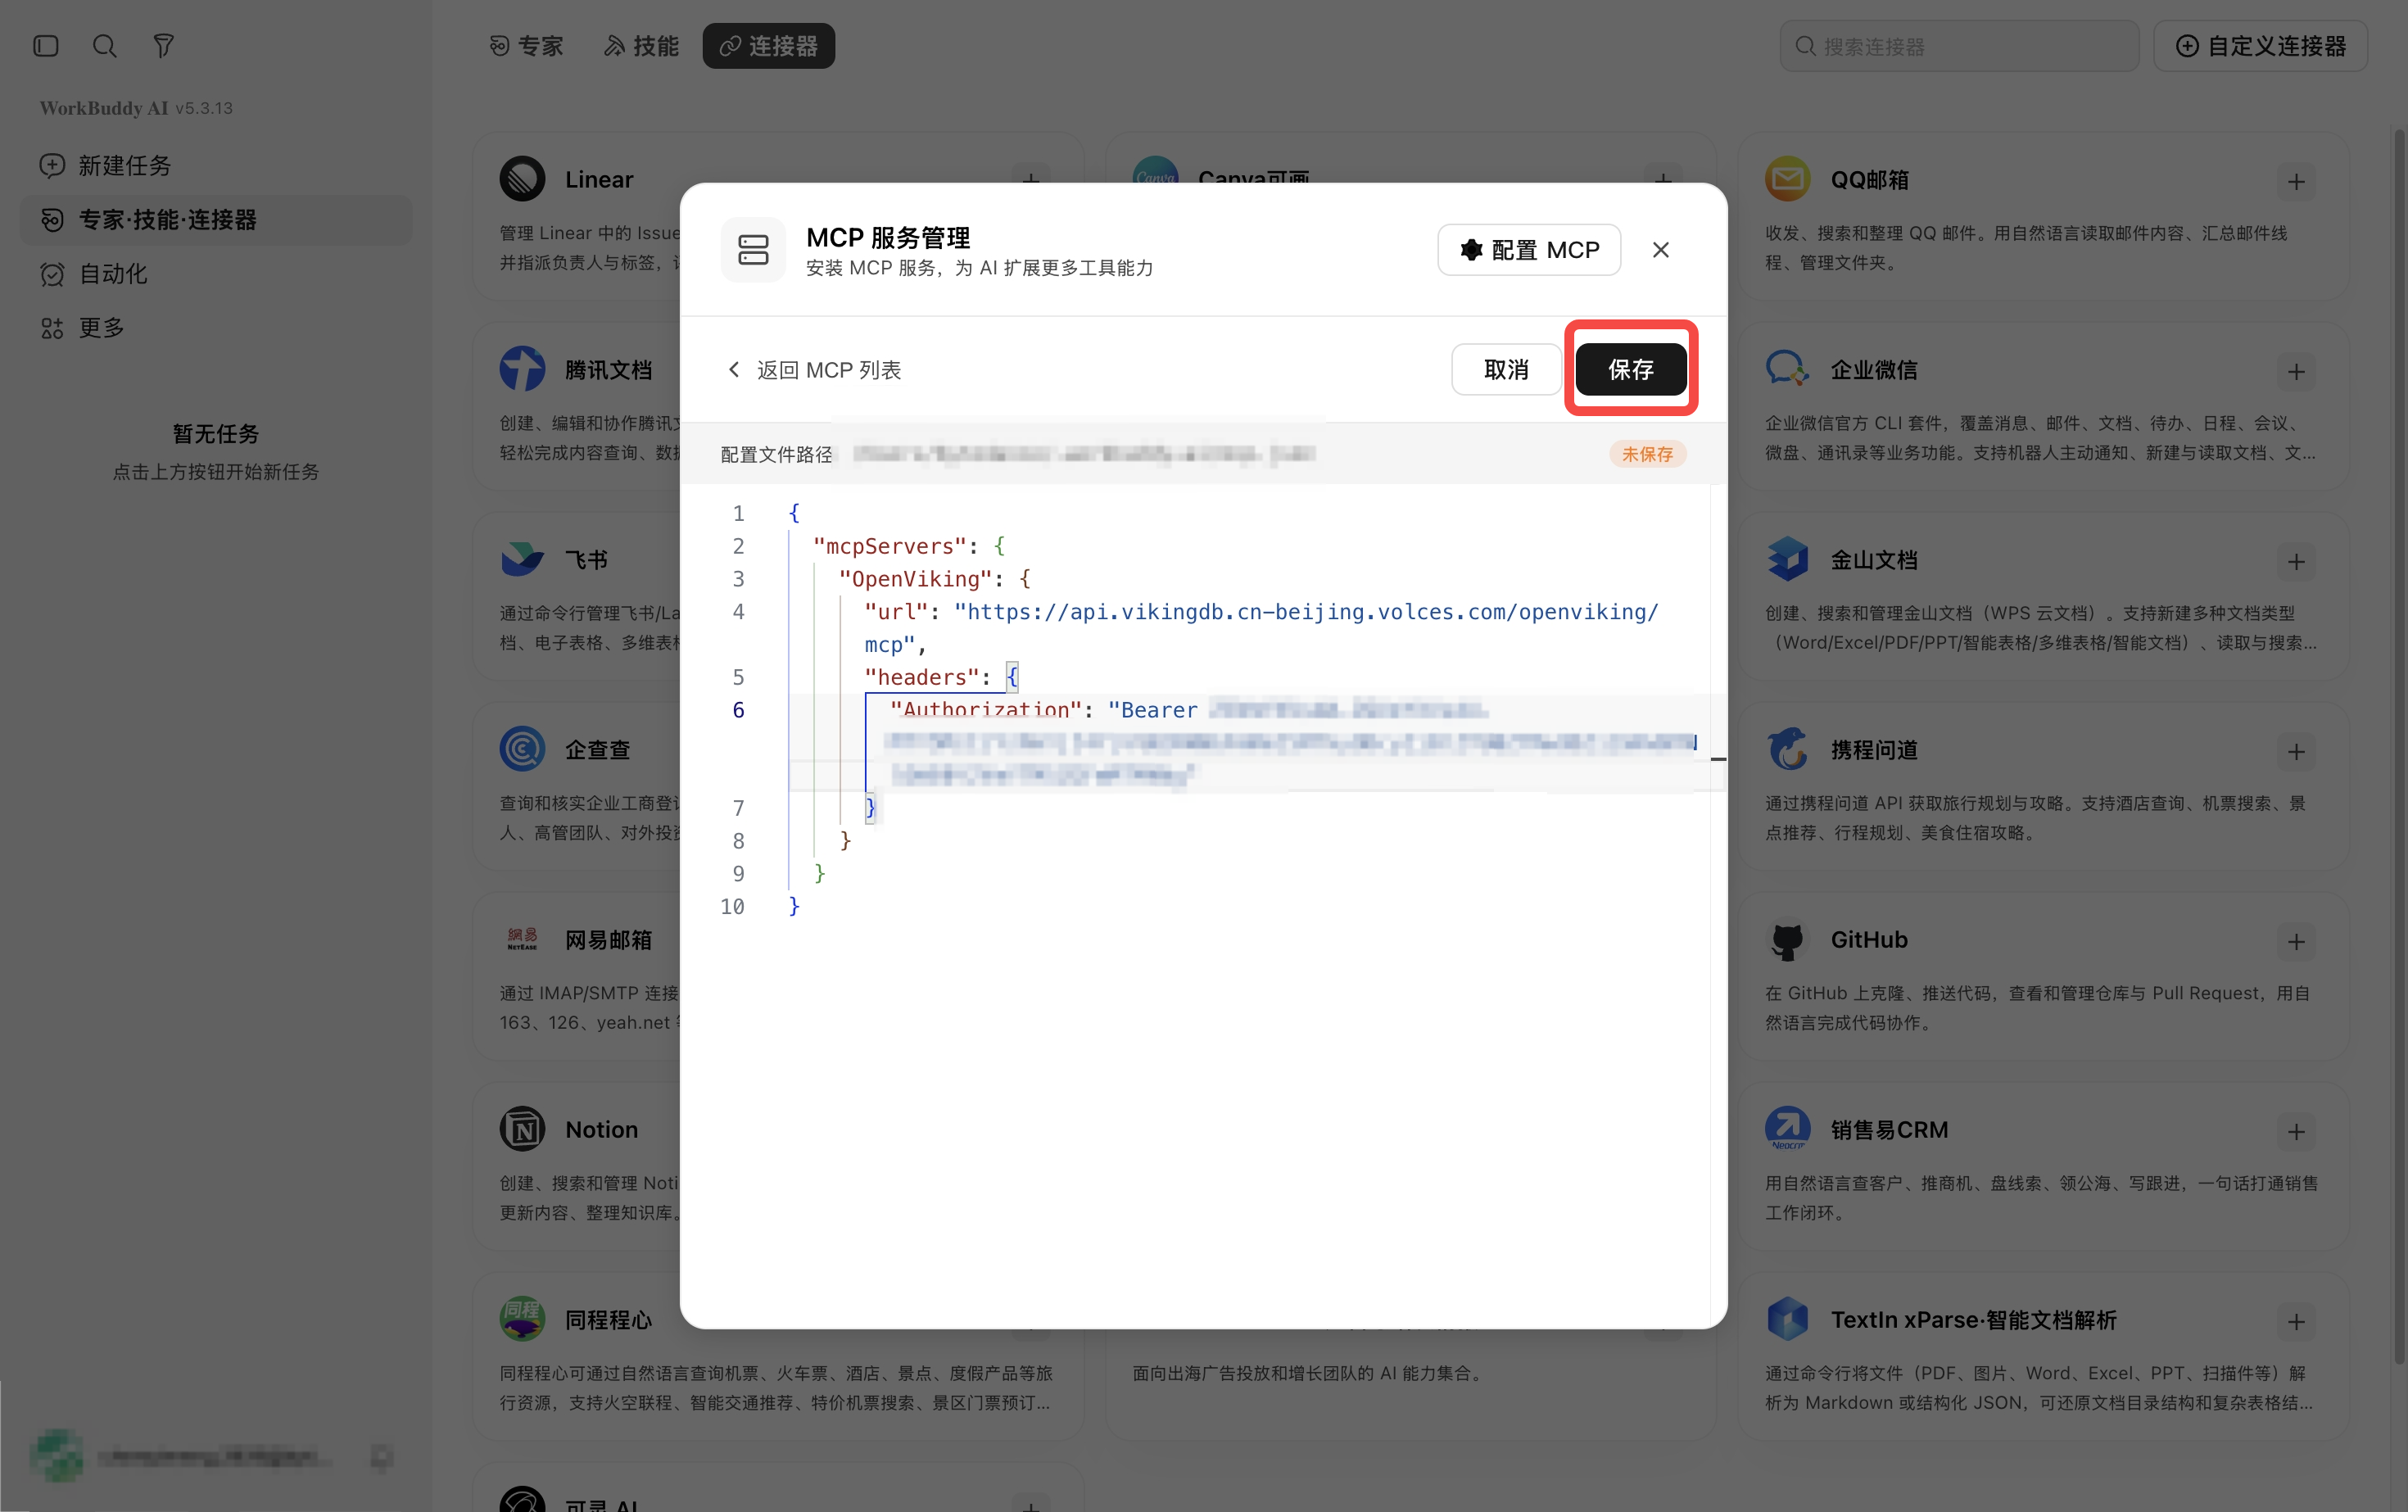
Add this configuration:
{
  "mcpServers": {
    "OpenViking": {
      "url": "{{OPENVIKING_BASE_URL}}/mcp",
      "headers": {
        "Authorization": "Bearer {{OPENVIKING_API_KEY}}"
      }
   }
  }
}
Select Save in the upper-right corner. The configuration is saved when the green success message appears.
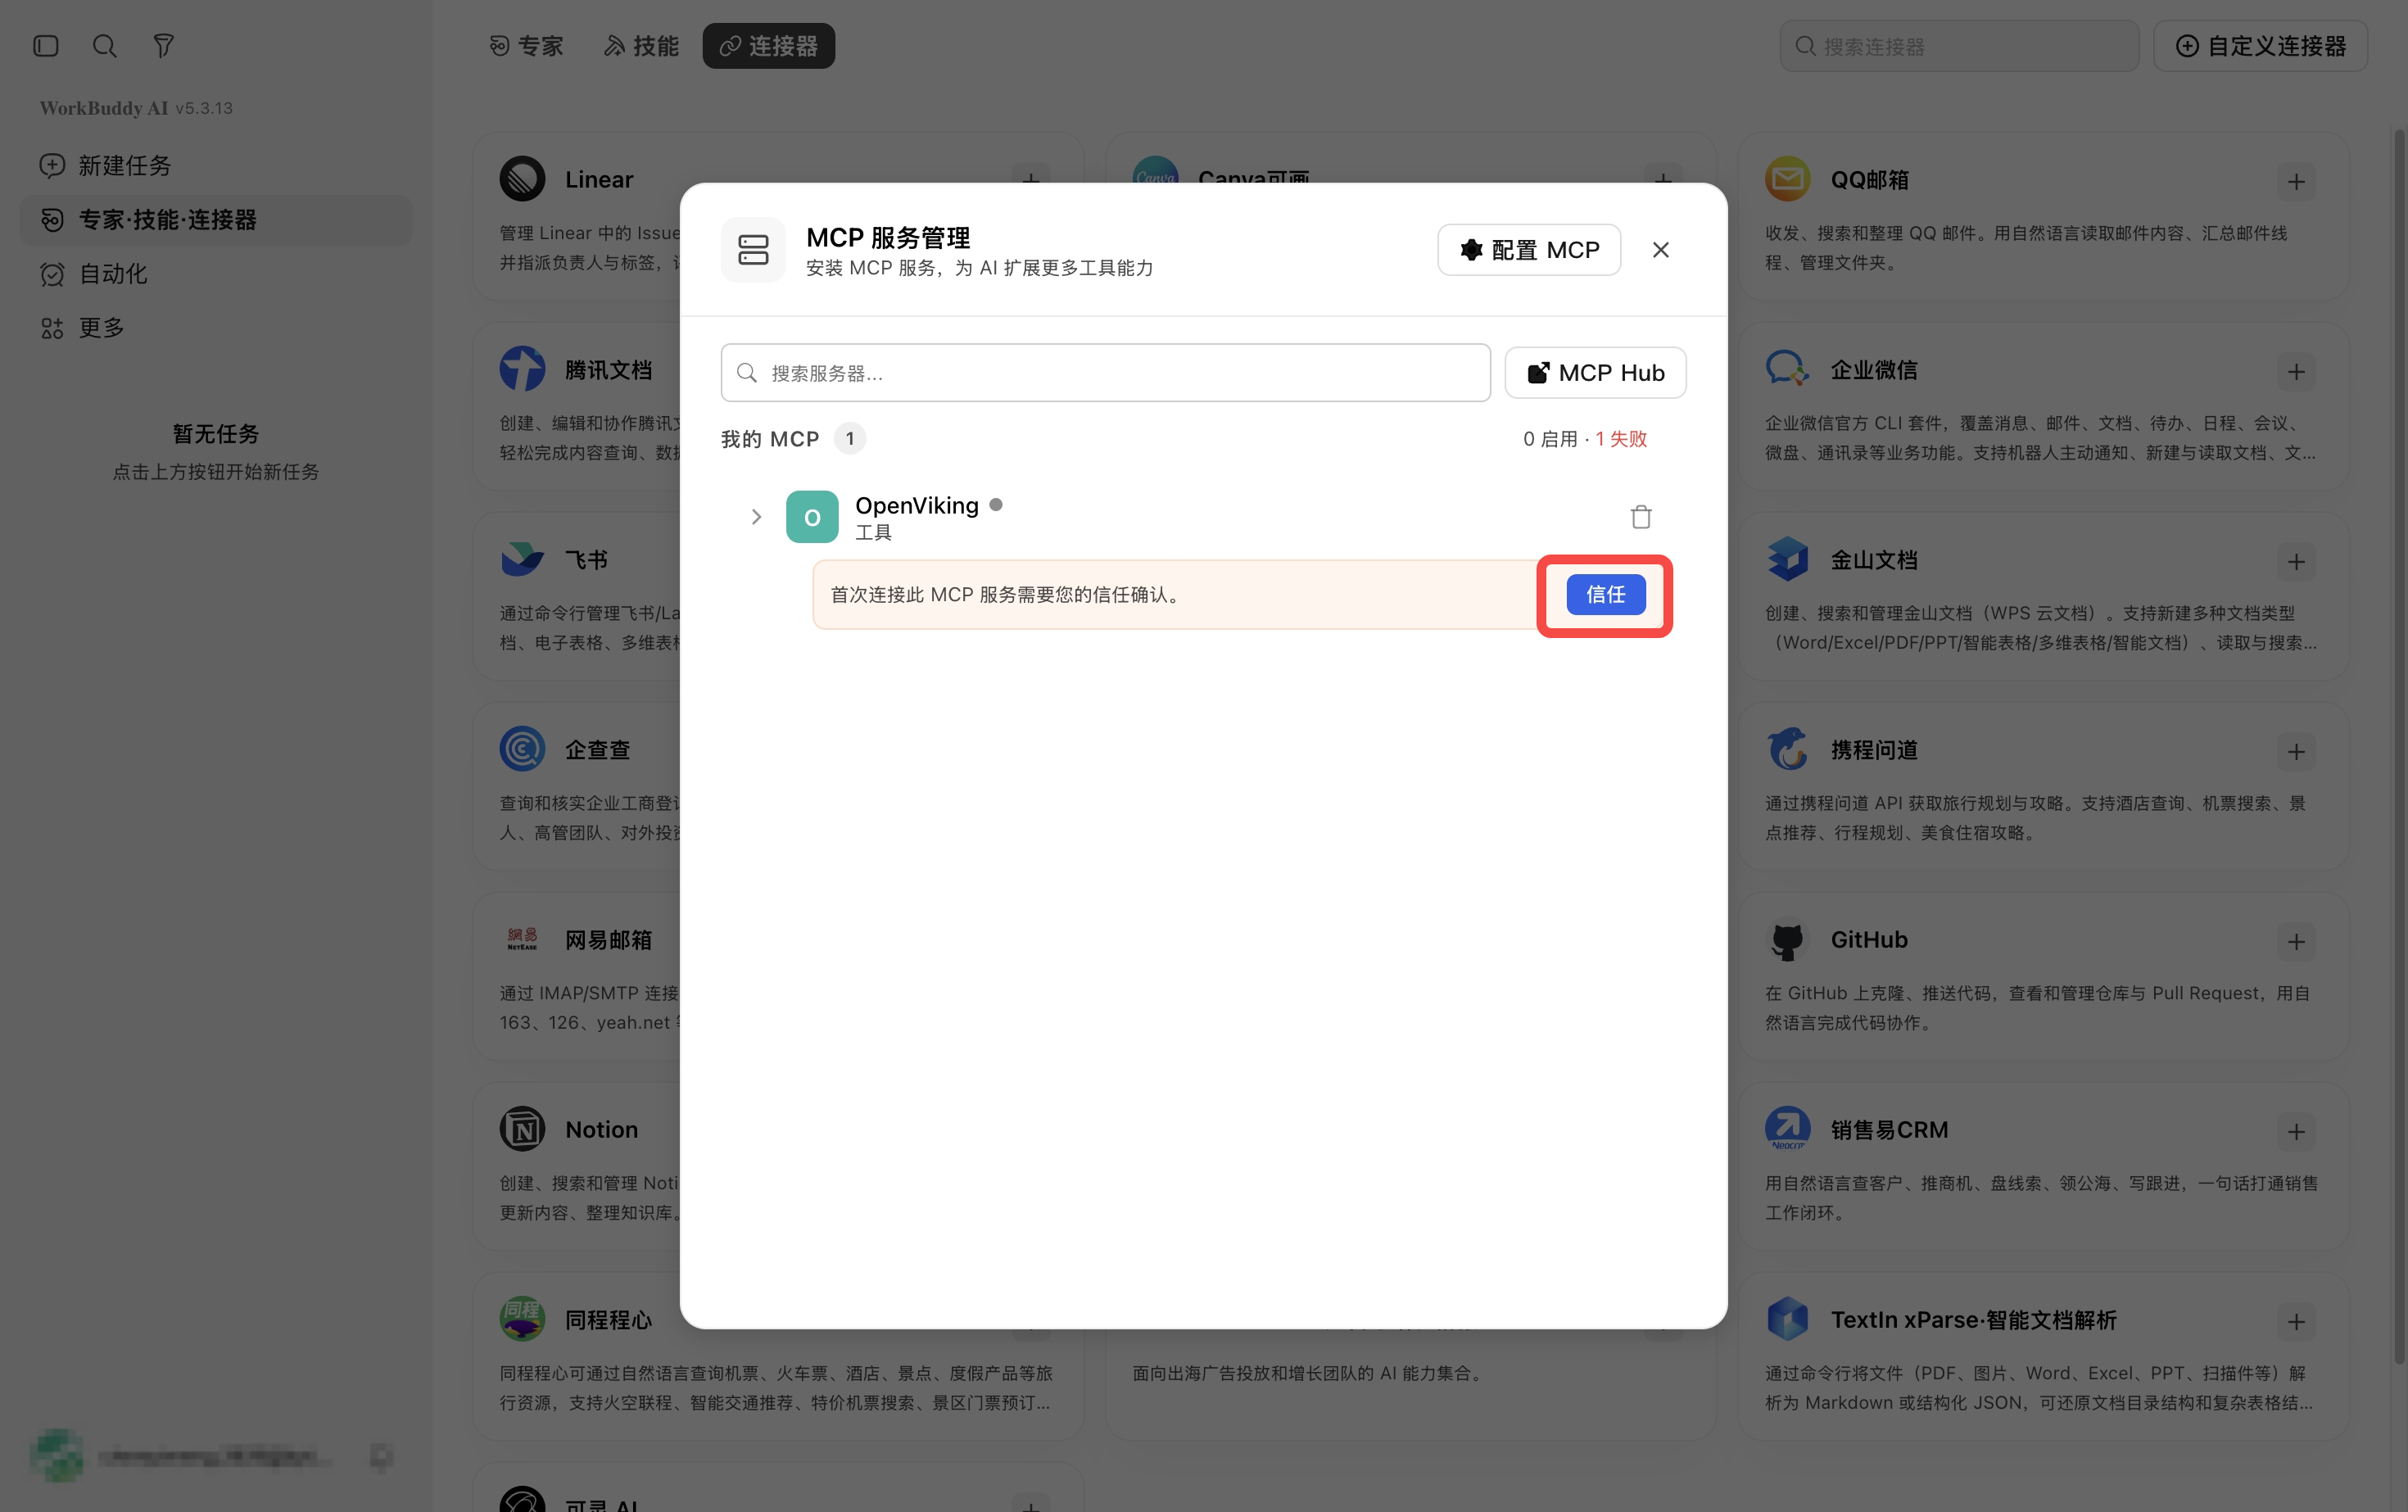
Return to the MCP list. If WorkBuddy asks you to trust this MCP service on first connection, select Trust.
Step 2: Verify
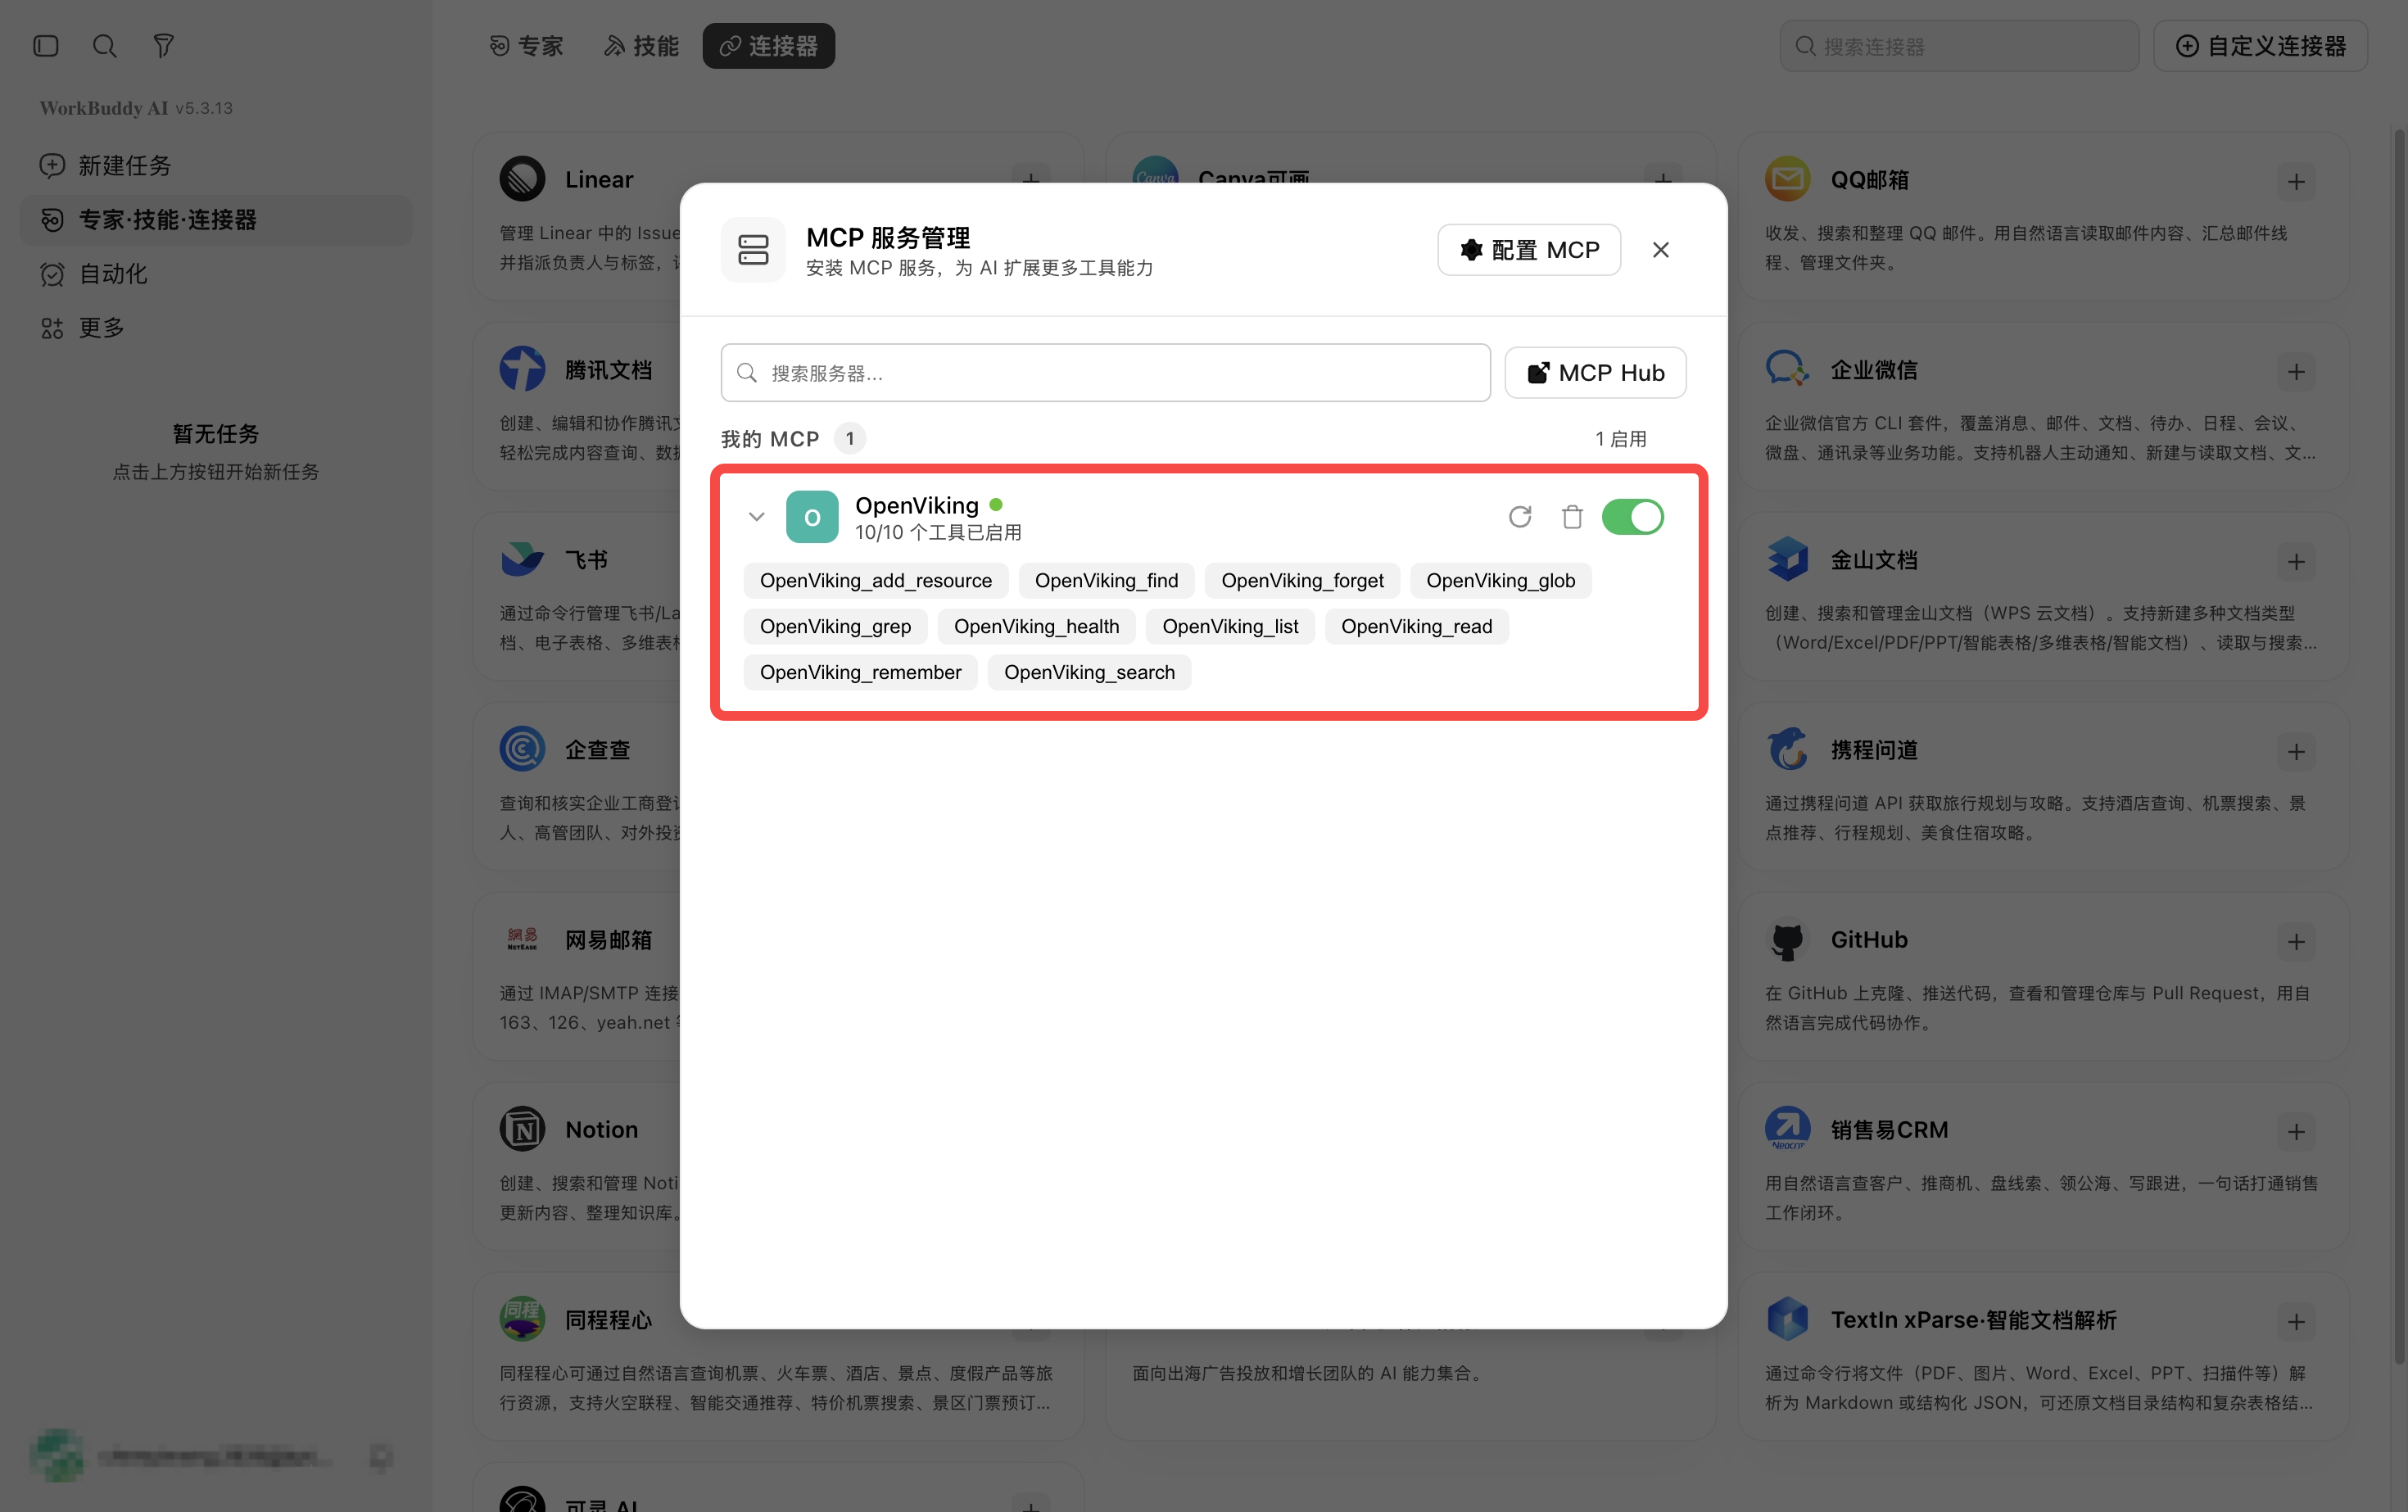
Return to the MCP list. Confirm that OpenViking appears under “My MCP,” is enabled, and shows enabled tools when expanded.
Troubleshooting
| Issue | Resolution |
|---|---|
OpenViking does not appear in the MCP list |
Check the JSON syntax and save again |
| MCP connection status is abnormal | Refresh the connection; if it still fails, check the JSON configuration and network connectivity |